Dungeon: Shimmermist Cave

Set-Up:
- Melee: Steel Battleaxe of Bitter Cold
- Magic School: Conjuration/Restoration
- Ranged: Orcish Bow(Fine)/Falmer Bow with Ancient Nord Arrows
- Armor: Amulet of Kynareth(+10 Stamina), Imperial Officer's Helmet(Fine)(+24% Magicka Regen), Silve Ruby Ring(+15% Two-Handed Dmg), Steel Armor(Fine)(+24% Magicka Regen), Steel Cuffed Boots(Fine)(+15% Two-Handed Dmg), Steel Imperial Gauntlets(Fine)(+15% Two-Handed Dmg)
- Companion: Lydia: Steel Set, Steel Battleaxe
Level: 13 100/100/230
First Thoughts:
- My first quest from the companions.
- This "dungeon" is packed with Falmer... I hate Falmer.
Note1: Falmer can be quite difficult at lower levels, be cautious.
Note2: Shimmermist Cave is part of a larger cave system.
Note3: The enemies in this "dungeon" are extremely difficult at low levels.
Play-By-Play:
- "A group of Falmer has been causing trouble in Whiterun. I've been asked to clear out Shimmermist Cave."
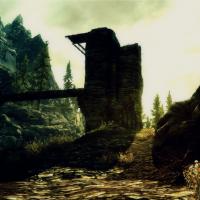
- Lydia and I exit Whiterun to an overcast Skyrim, perfect for getting me in the mood for this "dungeon."
- We know to expect Falmer, but the numbers are unknown.
- My horse has been gone for a few days now and we have to walk; I hope it's still alive.
- The thunder seems to be getting louder.
- Further down the road the ground begins to shake, and Lydia's eyes move to the sky, a dragon.
- The beast lands in front of us, the rain dripping from its scales.
- I dive behind a rock before the dragon can freeze me with its breath.
- I emerge after hearing the beating of wings, but the dragon circles around to attack something; my vision is skewed by the rain.
- Getting closer I see my horse rearing in the dragons face, is this bravery or stupidity?
- I send an arrow flying into the dragon's side and it takes flight once again.
- Lydia readies her sword and I summon my atronach.
- A sabrecat has taken notice and pounces on the huge beast, but it doesn't stand a chance and is soon killed.
- As the cat's body goes limp I watch the dragon turn and ready its frost breath, this time there's nothing to hide behind.
- I start to run and watch as Lydia comes to my aid, cutting into the monster's side.
- I fly two more arrows and draw my axe; the dragon is wounded now and cannot fly.
- With a massive blow the dragon rears its head and falls to the ground, turning to embers.
- Lydia is amazed by the sight, I forget that she hasn't witnessed this as Faendal did.
- After we gather ourselves I mount my horse and we ride to Shimmermist.
- The entrance is dank and dark, but I need to prove myself to the companions.
- Lydia and I enter and we're met with a thick blanket of fog.
- The glowing mushrooms cause the entire area to glow; now we know how this place got its name.
- I move cautiously forward with my bow drawn.
- We come to a small clearing, but can hardly make out anything due to the glowing fog.
- I see the outline of a Skeever, and I send an arrow through the mist.
- On either side of the path there are giant waterfalls; this place is beautiful.
- Moving through the cave I notice a tripwire near the end and quickly disarm this deadly trap.
- Looking up at the glowing ceiling I can make out the silohette of a twisted creature, the Falmer.
- I fire an arrow into its back, but this monster is tough.
- As it comes down to our level, Lydia and I charge in; my axe sweeps the Falmer off its feet and I bring the blade down onto the creature's throat.
- While exploring the room Lydia an I find a few dead bandits, a chest next to the hut, and, on the top level, a Falmer Bow.
- The next chamber is home to another Falmer and a chest.
- We follow the tunnel into Shimmermist Grotto.
- This area is much like the last, but the faint hum of machinery can be heard in the distance.
- The fog in the next room is too thick to make out any enemies; Lydia and I proceed with extreme caution.
- As the fog clears I can see the two Falmer guarding a hut, and I send Lydia ahead as a distraction.
- I send an arrow into the furthest and summon my atronach.
- The smoke from their bodies now fills the room.
- The hut contains another chest and a pile of Chaurus Eggs.
- Lydia and I can hear the skittering of Chaurus below and we, reluctantly, move toward the sound.
- We find a tunnel that leads to the egg chamber.
- The Chaurus sees me before I can get in a suprize attack, but Lydia and I manage to take down the beast.
- Two more of them come into the room, and I'm hit with they're poison, but not before I can summon my atronach.
- Lydia goes down after I flee into the tunnel, but the atronach keeps them off of her.
- I heal myself as best a I can and return to the fight.
- The three Chaurus are dead and Lydia is alive.
- We follow the cave into a large room and a pit; probably where the two Chaurus came from.
- I find a chest at the entrance to the next tunnel.
- The shadow of a Falmer dances across the wall in the room ahead, and we silently move closer.
- My arrow flies into the Falmer's neck as it charges and the creature is met by the blade of my axe.
- The setting changes from the overgrown cave to a ruin of some sort.
- There are symbols covering the walls and broken pillars.
- The tunnel merges into a hallway with a set of giant golden doors at the end.
- The room appears to be at an angle and pistons line the walls, a single, glowing hut sits across the room.
- A Falmer Gloomlurker sits at a table experimenting with something, but what catches mine and Lydia's eyes is the massive, walking machine; a Dwemer Centurion.
- I send an arrow into the Falmer and awaken the giant Dwemer Autromaton.
- My arrows, with the help of Lydia and my atronach make for an easy battle, but now we have the Gloomlurker to worry about.
- The fight seems to last forever, but eventually the Falmer is nothing more than a smoking corpse.
- Lydia and I look around the room and find another chest and a few Dwemer artifacts.
- We move to the other side of the room and follow the tunnel back to the "waterfall room" in Shimmermist Cave.
- My first quest for the companions is complete and Whiterun will no longer be terrorized by these creatures.
Chests/Bosses:
Chest1:
- Difficulty: Unlocked
- Loot: Gold(27), Potion of Healing
- Affected: No
Chest2:
- Difficulty: Unlocked
- Loot: Gold(15), Potion of Minor Stamina, Ruby, Iron Armor
- Affected: No
Chest3:
- Difficulty: Unlocked
- Loot: Orcish Arrow(8), Gold(12), Petty Soul Gem, Potion of Minor Magicka, Potion of Stamina, Dwarven Mace
- Affected: No
Chest4:
- Difficulty: Unlocked
- Loot: Gold(15)
- Affected: No
Chest5:
- Difficulty: Unlocked
- Loot: Gold(108), Iron Ore, Potion of Healing, Elven Boots
- Affected: No
Boss Battle:
- Boss: Falmer Gloomlurker
- Weapon: Sword
- Playstyle: Battleaxe, Bow, and Conjured Atronach
- Loot: Falmer Shield, Falmer Ear, Gold(9), Silverside Perch, Falmer Helmet, Orcish Arrow, Falmer Sword, Pickaxe
- Affected: No
Notable Items/Locations:
- Raw Material: Assorted Dwemer Pieces: Smithing: Found on alter in boss room,

Comments
Maybe I'll recreate Ulfr the Blind... more